05 December 2007

Some Advice About Inkjet Printers, Part 2

I have doled out a lot of verbal advice over the past few years related to inkjet printers: which ones to buy, when to replace the cartridges, when to replace the printer you've got, and so on.

This is Part 2 of a three-part series of Tech Tips focusing on inkjet printers. If you missed Part 1, click here to read from the beginning.


4. Buy an inkjet printer that has separate ink tanks for each color.

Some inkjet manufacturers, particularly HP, like to make printers that only take 2 ink cartridges: one black and one "color". This color cartridge will usually have 3 color tanks inside of it: cyan, magenta, and yellow:
While this may appear to simplify printer maintenance, it is a highly-flawed design. When one of the three colors runs out, you have to replace the whole cartridge -- throwing away the remaining ink in the other two colors!

No matter what type of printing you do, odds are that you don't use all 3 colors equally. For instance, you might run out of yellow first. The printer monitoring application will let you know that the "color cartridge" as a whole is out of ink and needs to be replaced, even though it's just one color that's out. There is nothing you can do but toss the cartridge and buy a new one.

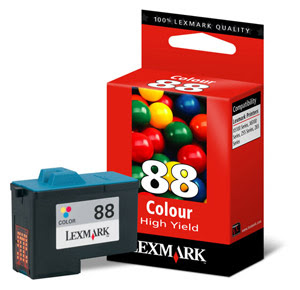
Make sure you purchase a printer that uses separate cartridges for each color, such as these color cartridges:
When a color runs dry, you will only be required to replace that one color.

5. Beware of printers that use ink cartriges that have the "print head" on them.

Combining colors in ink tanks is not the only trick that HP has up its sleeves to force you to spend more money. Most HP inkjets (as well as those of other manufacturers) make the "print head" part of the ink cartridge. So when you run out of ink, you're not just replacing the ink and the tank that contains it. You're replacing the print head every single time you run out of ink.

What exactly is the "print head"? According to the "inkjet printer" article on Wikipedia:

Most commercial and industrial ink jet printers use a piezoelectric material in an ink-filled chamber behind each nozzle instead of a heating element. When a voltage is applied, the piezoelectric material changes shape or size, which generates a pressure pulse in the fluid forcing a droplet of ink from the nozzle. ...Piezoelectric ink jet [printers allow] a wider variety of inks than thermal or continuous ink jet [printers] but the print heads are more expensive.

So the print head is the collection of nozzles and the technology behind them, like the one on this HP inkjet cartridge:

...and they're not cheap! One perusal past the inkjet cartridge aisle at your local office supply store will show that ink cartridges that have built-in print heads cost significantly more than those that don't.

Although print heads can become clogged over time, it is not necessary to replace your print head as often as you replace your ink cartridges (except, perhaps, under the most extreme circumstances). Avoid inkjet printers with this design if at all possible.

If print head replacement is important to you, there are inkjet printers that separate the print head from the ink cartridges, but don't make the print head a permanent part of the printer either. Several Canon inkjet printers offer this option. They offer the print head as part of a disposable "cradle" for all of the ink cartridges:

With this design, you can swap out the ink cartridges ("ink tanks") as needed, then swap out the print head at any time you wish.

6. Seek out aftermarket ink cartridge manufacturers if possible...but beware!

If you're stuck with the printer you've got, here's a fact that your printer's manufacturer doesn't want you to know: you don't have to buy their cartridges.

There are tons and tons of third-party/generic inkjet cartridge manufacturers on the internet who sell replicas of HP/Canon/Epson/Lexmark-brand cartridges for a fraction of the cost of the real thing. I have not tried any of these sites personally, but I've heard particularly good things about Carrot Ink; Rhinotek and PrintPal have also gotten good grades from a leading review site. (Don't forget to check http://www.ebay.com/ and http://www.amazon.com/ too, as many discount and bulk-purchase deals are offered there.)

And if you're really adventurous, you can try to refill your ink cartridges yourself! "Refill kits" are also available on the internet through third-party manufacturers:

These refill kits usually consist of several bottles of "compatible ink", a series of syringes, and instructions. (Sounds like something stolen out of Jason Giambi's mailbox, I know.) In my limited experience with them, I've found these kits to be messy and the final results somewhat unreliable. But if your printer is out of warranty and you don't care if your output gets a little splotchy and/or inaccurate at times, then this is probably the most cost-effective solution for you.

So is third-party the answer? Well, not exactly. For one, some printers won't accept generic cartridges. Canon notoriously upped the ante on its generic competitors by implanting a chip on many of their "genuine" ink cartridges. Numerous Canon inkjet printers will not operate unless all ink cartridges have the proprietary chip. The chip also keeps track of when the cartridge is empty, so the printer knows if you've tried to refill the cartridge. The printer may allow you to print using a "refilled" cartridge, but not without a slew of error messages and threats to void the warranty.

Third-party manufacturers have responded to this by giving you ways to pull the chip off of your empty "geniune" ink cartridge and glue it to your new generic cartridge. Here is one such site that shows how to do it (it doesn't look easy): http://www.discountcartridge.com/instructions.html

Also, other third-party manufacturers have responded to the chip "ink level tracking" issue by putting out "chip resetters," devices you can use to reset the chip back to "full" or "factory new".
There are a few other compatibility issues that come into play with third-party ink cartridges that I will get into later in this 3-part series. Also, if you are a ConsumerReports.org member, be sure to check out their excellent test on generic ("off-brand") ink, which can be found here.


That will do it for this week! Tune in next week for my final series of inkjet tips...

Click here for Part 3 of this series on inkjet printers...

28 November 2007

Some Advice About Inkjet Printers, Part 1

I have doled out a lot of verbal advice over the past few years related to inkjet printers: which ones to buy, when to replace the cartridges, when to replace the printer you've got, and so on.

It's time to wrap all of it up into a three-part series of Tech Tips. I have several pointed opinions related to inkjet printers, mainly because I think that the inkjet business has become fraught with deception and waste in recent years. This week, I will try to reign in some of my frustration and boil down the most important things to know about inkjet printers and cartridges. Some may be news to you.


1. Inkjet printers themselves have little-to-no actual street value.

You read that correctly. Don't believe me? Right now, your favorite electronics store is selling straight-up (non-scanning, non-faxing) inkjet printers for prices between $30 and $140. One glance at BestBuy.com shows that the average cost of the 5 desktop inkjet printers they have for sale is $85.49.

But they probably come with ink cartridges, which are worth by themselves close to 60 or 70 dollars! For instance, the median-priced Epson Stylus C120 printer requires 4 ink cartridges (black, yellow, cyan, and magenta). While BestBuy.com sells the C120 for exactly $85.49, it also sells those 4 cartridges at a combined price of $56.46. That means that the printer itself (minus the cartridges) is really worth less than $30.

So if a brand-new printer is really only worth $30, then how much does your 5- or 6-year-old inkjet printer worth? Probably nothing. These days, when your aging inkjet printer runs out of ink, it is actually more cost-effective to throw it away and buy a new printer than to buy new ink cartridges for it.

For instance, suppose you have an old HP DeskJet 990cse inkjet printer. This printer is probably about 7 years old, and you've found that it needs new ink cartridges: a black cartridge (#45) and a 3-color cartridge (#78). A quick check on BestBuy.com shows that these cartridges cost $31.99 and $36.99 respectively, for a whopping grand total of $68.98. For that amount of money, you could just throw the printer out and buy a brand-new inkjet that comes with its own new cartridges! Plus, you would get a far-better printer (virtually all inkjet printers on the market these days print decent photos), fresh from the factory with a new warranty.

Why is this the case? Because inkjet printer manufacturers realized that the money to be made isn't in the printer -- it's in the ink. I liken this to the refillable razors made by companies like Gillette. The razors cost very little -- the cartridges are what cost money. At CVS, you can purchase the MACH3 razor for $8.49, which comes with 2 cartridges. But a package of 4 cartridge refills is $9.19....more than a new razor!

The bottom line is that inkjet manufacturers know that once you buy their printer, you're essentially stuck buying ink cartridges from them. There are exceptions to this which I will describe later, but keep this rule in mind.

2. Many inkjet printers lie to you about when you need to replace its cartridges. Don't replace an ink cartridge until it is completely out of ink.

Once inkjet manufacturers realized how much money they could make selling you cartridges that you have to buy from them, the next thing they realized they could do is force you to buy cartridges more often. Many, like Lexmark, did this by selling you cartridges that make it impossible to see how much ink remains in the cartridge:

With an opaque case and no "window" into the ink tank, you have no idea how much ink is in the cartridge. The only way to tell is -- surprise! -- the manufacturer's ink monitor software on your PC! Sense a conflict of interest here? What would stop a piece of software from reporting that the ink is lower than it really is? Wouldn't it boost company profits if consumers were told to replace their ink cartridges before they were completely empty?

Epson certainly thought so. That's why they just settled a class-action lawsuit against them for "breach of contract, breach of implied warranties, unjust enrichment, [and] fraudulent concealment," among other things related to their inkjet cartridge business model. You can read more about the lawsuit here (http://www.epsonsettlement.com/), but you can boil it down to one particular abstract:

Among other things, Plaintiffs allege that Epson inkjet printers and inkjet cartridges indicate that cartridges are “empty” and suspend printer function, even though substantial ink remains. EAI has denied and continues to deny the claims and any wrongdoing, but has decided to settle to avoid the cost and inconvenience of litigation. The Court has not issued any rulings about the validity of the claims.

Epson printers are also notorious for giving you an additional "Ink is Low" warning. Once the ink level in a particular cartridge gets below a certain point, you receive this warning every single time you print something. While your natural inclination is to replace this cartridge, do not replace it! There is still plenty of usable ink left in that "low" print cartridge. This is simply one more deceitful way that your printer manufacturer is trying to trick you into throwing ink away and buying more of it from them.

3. And whenever possible, buy clear-case ink cartridges.

Related to the last topic, the easiest way to avoid this Mystery Ink Level scenario is to buy ink cartridges with clear, see-thru cases, such as this one:

With clear cases, you can visually inspect a cartridge when the printer or its software tells you the ink is low to verify. This may take some prior planning, as only certain printers use these type of cartridges. When shopping for a printer, take a good look at the cartridges that it uses. Try to buy a printer that uses clear-case ink cartridges.

That's all for this week! Tune in next week and the week after for lots more related inkjet advice...

Click here for Part 2 in this series on inkjet printers...

21 November 2007

Holiday Mailings Made Easier

It's the holiday season once again, and that means it's time to bulk-mail family photos, personal narratives, and other silly things to our friends, family, and.....well, pretty much everyone we know with a valid mailing address!

Despite the fact that technology for doing mass-mailings has been around for decades, many people still try and do their holiday mailings by hand!!! Not automating a task like this is like forgoing the garden hose to fill your swimming pool with buckets of water from the kitchen sink.

You are probably aware that Microsoft Word has the ability to do mailing labels, envelopes, form letters, and other mass-mailing functions, but may not know how to use it. The "mail merge" was one of the first big uses of early personal computers -- so called because you were in essence merging an address database with a word processing document or documents.

This week, I will show you how to use the Mail Merge feature of Microsoft Word to create pages of mailing labels for your holiday envelopes...


1. First, you will need to purchase 8.5"x11" sheets of mailing labels at your local office supply store. The labels can be any size and any number per page, but make sure that there is an "Avery #" that describes the type of labels you purchase. The "Avery #" is a 4-digit number, such as "Avery 5920". You will need this "Avery #" later to tell Microsoft Word what type of labels are in your printer.

2. Open up Microsoft Word and start with a blank document.

3. In the menu bar, go to Tools / Letters and Mailings / Mail Merge...

4. In the right-hand pane that appears in your Microsoft Word window, select Labels, then click Next.

5. Ensure Change document layout is selected, then click Label options...

6. Now, you will need to select your "Avery #" from the scroll box under "Product number". Somewhere in this scroll box, the type of labels you purchased should be listed.

7. Click OK, then click Next.

8. Now you have to tell Word where all your addresses are. There are a lot of different ways of storing addresses on a PC, but two very common ways are using a simple Microsoft Excel spreadsheet or using the Contacts feature of Microsoft Outlook. I will assume you use the former: an Excel spreadsheet.

(If you use the latter, then you'll want to click on Select from Outlook Contacts and then Choose Contacts Folder. Highlight "Contacts" and click OK. Then skip ahead to step 13.)

9. Ensure Use an existing list is selected, then click Browse...

10. Now show Word where your Excel file is located on your hard drive. Browse for it, select it, then click Open.

11. Your Excel file may have more than one worksheet in it. If so, Word will now ask you which worksheet to use. Most likely, you put all your data in the first one, so select the first table. Also, if you put a "header row" in your spreadsheet (a row of column titles, like "Last Name", "First Name", "Street", "City", "State", etc.), check the box next to "First row of data contains column headers".

12. Click OK. Now a new dialog box appears...let's take a look at it:


13. You'll see that Word has parsed your mailing list and tried to make some sense of it. Look along the header row to ensure that all of your important categories are there: Last Name, First Name, Street, City, State, ZIP. There may be other categories as well. Look down each column and verify that the data (on the whole) is in the column that it belongs in.

14. Now examine each row. Un-check boxes for people you don't want to print a label for. Microsoft Word does not care why you don't want to send Christmas cards to these people. Perhaps you are upset with this person because he or she has insulted your car, or failed to invite you to a private book burning, or given you a serious but treatable venerial disease. No matter the case, Microsoft Word respects your decision to leave them out of your mail merge. It will not broadcast your decision over the Internet, nor will it ask "Are you sure?" like other applications might.

15. Seriously, though, you may find rows in this list of bogus or nonsensical data. You might as well un-check the boxes for these rows as well, as they will only waste labels. Once your check boxes are the way you want them, click OK, and this dialog box finally disappears.

16. Click Next.

17. Now click Address block...

18. In the "Insert Address Box" dialog box that appears, you can now customize the way the names and addresses will be presented:


In the first drop-down box, select how you want the names to appear. Then you might want to uncheck the box next to "Insert company name" unless these are business contacts receiving your mailing. The last two check boxes should probably remain checked.

19. Now click the Match Fields... button. Another dialog box pops up:


20. Carefully look through this list of fields. This is where Word tries to match up address fields with the columns in your address data. A lot of times it has to guess, and it is not a very good guesser. For instance, in the above example, you can see that Word was unable to determine which column was the "State" column in my Excel address list. To correct this, you simply click on the down-arrow next to the incorrect guess (in this case, it says "(not matched)") and select the correct column from the drop-down box. When all the important fields (Street, City, State, ZIP, etc.) are correct, click OK.

21. Now click OK again, and now you should see that "<>" has been added to the first label on your label sheet.

22. Back to the right-hand pane we go! Click the Update all labels button. Now the "<>" has been added to all the other labels.

23. Click Next. Now you can see a preview of your label sheets! Click the >> and << buttons to scroll through the list.

24. Click Next.

25. Click Edit individual labels...

26. Make sure All is selected, then click OK.

27. You now have a new Word document with all of your labels on it ready to go! Do yourself a favor and save it now before you make any tweaks to it.

28. You may want to change the font to something more interesting. If so, simply hit CTRL-A to select the whole document, then change the font to something festive. I like "Viner Hand ITC", myself.

29. Eyeball your labels one by one to ensure the mail merge didn't create any oddities, such as extra spaces, random punctuation, partial addresses, or bogus listings. Also watch out for special/unique circumstances that the mail merge may not have been aware of, such as spouses who have different last names and people who go by their middle name. This is your opportunity to edit and tweak individual labels before you print them.

30. Once everything is looking tip-top, save your document and print it out onto your label sheets! Make sure you load the label sheets into the printer correctly. Top-load inkjets generally want them face-up, while bottom-load inkjets want them face-down. Laser printers can be either, but I would wager a guess it probably wants them face-up. If you're not sure, use a marker to write a small "X" on a piece of paper, load it face-up, and print page 1 of your labels on it. If the "X" ends up on the same side as the printed text, then you want to load the label sheets face-up.

31. If you find major errors in your labels, don't fret. You can still go back to the mail merge process you ran earlier. Click back to the other Word window you have open...you'll find your mail merge session still intact:
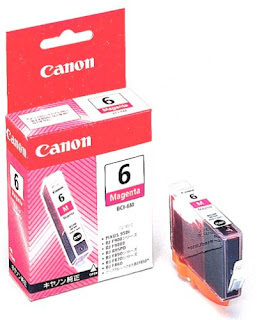
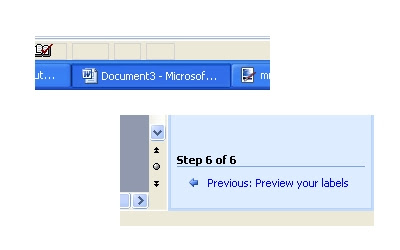
Click on Previous in the right-hand pane to go back through the mail merge process. You can make adjustments, then regenerate labels as many times as you need until you get the labels exactly the way you want.

14 November 2007

Share and Share Alike

People often ask how they can share their personal calendar in Outlook with other employees. It's very easy to do.

In Outlook, go to Tools and select Options. Then click on the Delegates tab...


Here, you can add people and give them permissions (or the lack thereof) to whatever you'd like them to see and/or edit in your Outlook account: Calendar, E-mail, Personal Contacts, etc.

Click the Add... button and select the names of people you want to give permissions to.

Click the Add -> button, then click OK. Now the names should appear in the Options dialog box (pictured above).

Highlight a name in this dialog box and click the Permissions... button to customize the permissions for that person.


Now you can give the user permissions to whatever you'd like. Make sure you uncheck the box next to "Delegate receives copies of meeting-related messages sent to me" unless this person is your personal secretary. You may want to check the box next to "Automatically send a message to delegate summarizing these permissions" if you don't feel like telling them personally.

The other checkbox, for allowing the delegate to see your "private items", is up to you. "Private items" are calendar items, e-mails, and others that are specifically marked 'Private' in their Properties. For instance, perhaps you are scheduling a surprise party for your delegate. You do not want your delegate to see a calendar item that says "Surprise Party for Mark at Burger King in Westborough". However, you do want your delegate to know that you will be busy at that point in time. Just click the "Private" checkbox in the lower-right corner of your Calendar item properties window and the item becomes private. On your calendar, the item will be denoted as private with a key symbol. Your delegate will see your calendar, but that item will simply be labeled 'Private' and unavailable for them to view.

Once you've been granted permission to someone else's calendar, go to your own calendar in Outlook. In the left-hand pane, click on "Open a Shared Calendar...".

Type in that person's username. Now their calendar will appear side-by-side with your own calendar! Also, under "Other Calendars" in the left-hand pane, and that person's calendar appears with a checkbox, allowing you to view or hide that person's calendar anytime in the future.

07 November 2007

Help Us Help You

Nothing is more time-consuming for IT Help Desk people than trying to troubleshoot poorly-described help requests. Here are a few examples of the most common poorly-worded help requests that the average IT department receives and some simple solutions:

1. “Something’s wrong with my computer.” / “The computer in room ___ is acting funny.”

This is about as non-descript as you can get. Is the computer covered in coffee? Has someone turned the monitor upside down? Is it on fire?

If you don’t know what’s wrong with your PC, at least give your Help Desk the answers to these simple questions:
  • What do you see on the screen?
  • What were you doing when this started happening?
  • What are you trying to do/unable to do now?

2. “I can’t log in.”

These days, there are a lot of different places that an employee of a company has to do at different times:

  • Initial log in to the network domain
  • Opening up Outlook...usually an invisible log-in, but not always
  • Using Outlook Web Access at home or at a remote site for email
  • Using a VPN client to connect to the network remotely
  • Logging into a particular database or data warehouse
  • Many more!

Tell your Help Desk which one you’re talking about! Also, if you forgot your password, just say so. It’s easy to reset it, but they need to do it over the phone or in person. And for security reasons, don't trasmit passwords over email.

3. “There’s no network at home.”

This is a non-specific description of one of many unique possible problems. You will need to do some troubleshooting to narrow down to the source of the problem.

First of all, are you able to surf the internet? Test this by typing in the name of a website at the top of your Internet Explorer window, such as http://www.google.com/ or http://www.yahoo.com/.


If no websites appear, then it’s best to turn the cable modem (or DSL modem) off and on. This resets the connection with the Internet Service Provider (ISP) and usually corrects this problem.
Still no websites? Next, turn the router off and on (if there is one).

If you are able to surf the internet and still can't "log-in" to get company email or network resources, then your problem is either:

(a.) Difficulty logging in to Outlook Web Access for email

or

(b.) Difficulty establishing a VPN connection

If the answer is (a.), then you have an issue with your network account that requires you to reset your password. If the answer is (b.), then the VPN settings have probably been misconfigured. When you call your Help Desk, be sure to describe which of these two it is.

4. “I can’t print.”

Do you have any printers installed in your user profile? This should be your first check. Click on Start, then click on Printers and Faxes. (If you don't see "Printers and Faxes", click on Settings, then you should see a link for Printers and Faxes.) A window will pop up with all of your installed printers. If you don't see any here, you'll need to install a printer by clicking on Add a printer under "Printer Tasks" in the left column of the window. For more detail on how to install a printer, please see my 6 November 2005 Tech Tip entitled "I can't print!!!".

Which printer are you trying to print to? A likely problem is that the wrong printer is set as the default. In this "Printers and Faxes" window you now have open, your default printer is marked with a check mark like so:

Did you look in the print queue to see if that printer is printing other jobs ahead of yours? To look in the queue for a particular printer, simply double-click on that printer in this "Printers and Faxes" window and its queue will appear in a new pop-up window. It may be the case that the printer is stuck on a job in front of yours. Try deleting the print job at the top of the list. Then turn the printer off and back on again to clear the memory.


Help us help you. There are a million things that can go wrong on a computer network, so the more information you give us about your problem, the better chance we have of solving your problem in a timely manner.


“I'm out here for you! You don't know what it's like
to be me out here for you. It is an up-at-dawn
pride-swallowing siege that I will never fully tell you about!
Okay?! Help me help you…help me help you.”

(from the motion picture Jerry Maguire)

31 October 2007

Keyboard Shortcuts for Life

You know that guy. He's the one who's memorized all the keyboard shortcuts for every application so that he almost never has to touch his mouse. Update linked information in a Word source document? Obviously that's CTRL+SHIFT+F7. Extend a selection or block without reselecting? Just hit CTRL+SHIFT+F8 then an arrow key. Select all Excel cells that contain formulas that directly or indirectly reference the active cell? Easy, it's the ol' CTRL+SHIFT+}. Insert an AutoShape into a PowerPoint slide without using the mouse? Simply press ALT+U, use the arrow keys to select the shape, then press CTRL+ENTER.

If someday all computer mice are determined to cause sudden and violent death, forcing all computer users to throw away their mice, That Guy will be an instant millionaire.

Until then, for the rest of us, there are only about six keyboard shortcuts that are really worth permanently committing brain cells to. These shortcuts are awesome because they're simple, they're easy to remember, and most importantly, they are the same across almost every Windows application available today. Here they are:

SHORTCUT: CTRL+X
FUNCTION: Cut
MNEMONIC: The letter X kind of looks like a pair of scissors, don'tcha think?

SHORTCUT: CTRL+C
FUNCTION: Copy
MNEMONIC: C is for copy, that's good enough for me.

SHORTCUT: CTRL+V
FUNCTION: Paste
MNEMONIC: X, C, and V are all in a row on your keyboard: cut, copy, paste (respectively).
COMMENT: Use these and you'll see how fast you can copy-and-paste or cut-and-paste things (you don't have to look at your fingers to paste). This is particularly handy in Excel.

SHORTCUT: CTRL+A
FUNCTION: Select All
MNEMONIC: A for all!
COMMENT: By far the most underrated shortcut. Sometimes using the mouse to select everything from a large document or long webpage can take a painfully-long time! Instead just put the cursor somewhere in what you want to select and hit CTRL+A!

SHORTCUT: CTRL+S
FUNCTION: Save
MNEMONIC: S for save!
COMMENT: If you memorize and use this shortcut, you'll find yourself saving your work far more often.

SHORTCUT: CTRL+Z
FUNCTION: Undo
MNEMONIC #1: Say it out loud: "Con-trol zee is my fav-o-rite key!"
MNEMONIC #2: Z is the last letter. Undo is your last resort.
COMMENT: Okay, both of these mnemonics are terrible. But make no mistake: Undo is your best friend in the whole wide world. Keep him on speed dial.

Of somewhat less importance than these Awesome Six are three others worth mentioning since they're easy to remember: CTRL+B (boldface), CTRL+I (italicize), CTRL+U (underline).

And here's one last shortcut, since it has big value in Microsoft Internet Explorer: CTRL+N. Hit it and IE will open up another window for you. Not only will the 2nd window show the exact same webpage, but this new window will have your entire webpage history as well. This is incredibly helpful when you need to stay on the webpage you're at but need to simultaneously surf elsewhere...or when you need to surf a couple of different ways from the same webpage. Some examples of when this is handy:

1. You're reading an article and need to look up a word from that article in www.dictionary.com or www.wikipedia.com.

2. You're making a purchase online and want to compare prices after shipping from multiple vendors you found using www.froogle.com, so you do several partial orders on multiple websites.

3. You find a location using www.mapquest.com or maps.google.com. Now you need to get directions to that location for two different people coming from two different starting points.

(CTRL+N actually works in Office applications as well to automaticallly open up a blank new document/spreadsheet/presentation/email/etc., but who really cares?)

They may take a little getting used to at first, but keyboard shortcuts really can ease your workflow tremendously. Who knows...you might even find yourself slowly becoming the next That Guy after all...

24 October 2007

Good E-mail Habits

This week, I present to you a montage of short tips on how to keep your e-mail inbox manageable and functional.

1. Don't use your Deleted Items folder as a place to store messages that you actually want.

I'm not entirely sure why people do this -- it's sort of like storing important paperwork in the trashcan under your desk. Sooner or later, one of the maintenance guys is going to come around and empty the trash can. Now what? See #2 for a better solution.

2. The best thing to do is create mail folders for you to store messages you need to keep...and I mean lots of folders!

Do this by right-clicking in Outlook's left-hand pane on Mailbox - [Your Name] (for me it's "Mailbox - Martin, Greg") and selecting New Folder.... Type in the name you want to give it and click OK. I really recommend that you make lots of folders. That will make it easy to keep things organized, and easier to find messages you no longer need when it's time to clean things out.

3. Once you've stopped doing what's described in Tip #1, enable automatic Deleted Items emptying.

To do this, go to Tools and click on Options. Click on the Other tab. Now put a check mark next to Empty the Deleted Items folder upon exiting. Click OK. Now, every time you close Outlook (presumably at the end of your work day), Outlook will prompt you if it's okay to empty the wastebasket. You just click Yes when it does this and Outlook will take care of the rest.

4. If you've got hundreds or even thousands of messages in your Inbox, it's time to sort and delete. But don't fret: it's easier than you think.

If you have an ungodly amount of mail in your inbox, the odds are you've got a lot of stuff in there you don't even want.

Here's an easy way to sort those things out. In your Inbox, you'll see a beige bar above all the messages with the e-mail header categories: From, Subject, Received, Size, Flag, etc. These are actually buttons. Click on From or Subject. Now, all of your messages are sorted by either the sender or the subject line. This is very handy, because now all old "Weekly Memo" messages and "Schedule for this week" messages and other outdated mass e-mails are grouped together. It's now easy to just select all those messages that are grouped together and hit the Delete key.

Once that's done, you can also easily file away stuff with everything sorted by sender or subject line. For instance, if a particular person sends you a file (e.g. a summary .DOC file) every week or every month, it should be easy to see all those messages from that one person grouped together. In one motion, you can now select all those messages and drag them into a folder specially-created for these messages.

Once you've weeded out a lot of the junk this way, click the beige Received to return your view to the way it was originally. (If your oldest messages are at the top, click on Received again to reverse the sort order.)

5. Mailbox quotas/limits are based on aggregate message size, not the quantity of messages.

If you're often receiving automated "Mailbox Full" messages, it's not because you have too many e-mails. It's because you have too many large e-mails. In other words, you have too many e-mails with attachments.

What's the solution? Simple. Save the attachments to a folder and then delete the e-mails. To do this, open up the e-mail that has the attachment, go to File, and click Save Attachments.... If there are multiple attachments, you'll see a small dialog box open up listing all the attached files. Click OK. Now navigate to the folder where you want all the attached files to go and click OK. (Save the attachments in your My Documents folder if you need them for yourself; save them to a network folder if you need multiple people to access them.) Done! Now you can delete that large e-mail!

Also, don't forget to check your Sent Items folder for messages with attachments! This folder is the biggest culprit for accumulating large messages that you don't need.

17 October 2007

Rock the Vote!

Outlook has a clever feature that makes it easy for you to take a poll quickly and effortlessly: voting buttons. Here’s how it works:

1. Open up a new mail message in Outlook.

2. In the menu bar, under View, select Options.

3. Here, you can set up a number of intriguing options for your outgoing message. Since we're focusing on voting buttons this week, check the box next to Use voting buttons:


4. There is a drop-down box next to this option. You can select from the default voting choices (Approve or Reject, Yes or No, Yes or No or Maybe), or you can make your own. Making your own is simple: just separate the choices you want to give with semicolons like so:


5. Click the Close button.

6. Compose your email message as normal, perhaps asking the recipients to vote by clicking on one of the buttons they see below their menu bar.

7. Hit Send and off it goes.

8. Your recipients will receive your email message, and it will contain the voting buttons that you set up in step 4 below the menu bar:


9. All each recipient has to do is click on a button and a reply email with their vote is sent back to you automatically. Super-fast and effortless.

10. Meanwhile, you can track the voting on your computer. Simply open up the message you just sent (it will be in your Sent Items folder). Select the Tracking tab next to the Message tab. Under Tracking, you can see all the people you sent your message to and what they voted for (if they voted), plus what the current tally of each choice is:


10 October 2007

You Spin Me Right Round

There seems to be quite a bit of confusion about CD-ROM drives: which ones can burn CDs, which ones will play DVDs, etc. Hopefully this Tech Tip will eliminate all the confusion.

To determine what a CD-ROM drive is capable of, simply look at the front of it. You’ll see one or more logos. This is what they mean:


This is the most basic CD-ROM drive. It will read all types of CD-ROMs (the CDs that have computer files on them, like floppy disks).


Known as a CD-R drive, this drive will record (a.k.a. “burn”) CDs. Like a floppy disk, you can write files to a recordable CD. Unlike a floppy disk, this is a one-time-only thing. You can't erase what's already been written. Also, it will not record to re-writeable CD-ROMs (“CD-RW” discs).


This is a CD-RW drive. It will record CD-R discs as well as re-writeable CD-RW discs.


This drive will play DVDs and it will read DVD-ROMs (those DVDs with files on them -- just like a CD-ROM but 6 times bigger). But it won’t record DVDs.

There are two distinct and completely-incompatible types of “burnable” DVDs: one is called “DVD+R” and one is called “DVD-R”. They both hold the same amount of data and serve the same purpose.

This logo signifies the “minus” variety: DVD-R. This drive will record DVD-R discs: both video DVDs you can play on your TV at home, and DVD-ROMs you can save your files on.


Just like a DVD-R drive, but it will also work with re-writeable “minus”-variety DVDs (a.k.a. “DVD-RW” discs).
This is the official logo for the “plus” variety of recordable DVDs. This drive will burn “DVD+R” and “DVD+RW” discs.


This is a somewhat-new format called the “double-layer DVD”. As the name suggests, DVD+R DL discs hold almost twice as much data as standard DVD+R discs. However, the media is hard-to-find and quite expensive. None of the PCs at NECC support this format.

A lot of DVD “burners” will work with both DVD+R and DVD-R discs. That’s great; just make sure that the program you’re using to burn the new DVD is set to the correct format (DVD+R or DVD-R).

This is important to remember when using video editing software. For instance, when using Pinnacle Studio, you'll need to ensure that the program knows what kind of writeable DVD you've put in the drive:
  1. Under the Make Movie tab, click on the Settings button.

  2. Click on the Make Disc tab.

  3. There is a drop-down box labeled Media:. This is where you specify whether your blank DVD is a DVD-R or a DVD+R.

I have found far greater success with the DVD-R format than with the DVD+R format when trying to burn DVD videos.

03 October 2007

Wherever I May Roam

If you see either of these boxes pop up when you log in...


...your IT staff needs to know about it!

It means that for some reason, your roaming profile (which includes your Desktop, your My Documents folder, and your settings) is not getting transferred between the server and the computer you’re working on. You can continue to work at your PC, but your files will not be backed up to the server, and you won’t be able to access your files on any other computer.

26 September 2007

You AutoComplete Me

One very helpful feature built into Internet Explorer is AutoComplete. When you begin to write a word in a text box, AutoComplete will make a dropdown box appear with the completed word. You can then just use the down arrow to select the word and hit Enter.

This can greatly speed up entering repetitive data into web-based forms.

To ensure that AutoComplete is enabled, open up Internet Explorer. In the menu bar, go to Tools and select Internet Options…. Then click on the Content tab. The dialog box should look like this:


Click on the AutoComplete… button. You’ll now see a dialog box that looks like this:


Ensure that the first 2 check boxes are checked as shown. You can check the third box unless you are at a computer that multiple people use. Click OK, then Apply (if not grayed-out), then OK. Now AutoComplete is enabled for most circumstances that you type information into an Internet Explorer window.

19 September 2007

Speed Up Your PC in 3 Easy Steps

Is your computer running sluggishly? Here’s a 3-step process for giving it a quick tune-up: CLEAN, DEFRAG, PREVENT. You might find that doing so improves your PC’s performance substantially.

CLEAN.
First, let’s tell the computer to delete unnecessary files from your PC with the “Disk Cleanup” accessory application. Don’t worry: Disk Cleanup won’t delete any of your files, programs, or user data. This application only deletes temporary system files that accumulate on your PC from extensive internet usage and applications that don’t “clean up after themselves”.

  1. Go to Start and click on All Programs.
  2. Select Accessories, then System Tools, then Disk Cleanup.
  3. The program will begin by scanning your hard drive. After a minute or two, a dialog box will pop up with suggestions on what can be cleaned up. I recommend checking all the boxes that are available in the dialog box.
  4. Then click OK and let Disk Cleanup run in the background. It may run for up to an hour in some cases.

DEFRAG.
Over time, your hard drive becomes cluttered, just like your desk. Files are scattered in fragments throughout your hard drive and it becomes harder and harder for your system to locate and read those files when it needs them. A “defragmentation” program will scan your hard drive and rearrange all the files on your hard drive in a streamlined, organized fashion so that your computer can find what it needs in a fraction of the time it took before.

There is a defragmentation program built into Windows XP. To run it:

  1. Go to Start / All Programs / Accessories / System Tools
  2. Choose Disk Defragmenter
  3. Click on the Defragment button
  4. Let the Disk Defragmenter run!
  5. It will tell you when it’s finished…you can close out of the application when it’s done.

PREVENT.
Here’s one way to ensure that your PC won’t accumulate a ton of unnecessary files in the future.

  1. On your desktop, right-click on the Internet Explorer icon (the blue “e”) and select Properties.
  2. Click on the Settings button.
  3. In the white box, change the number to a low number such as 5. (This changes the maximum amount of temporary data that Internet Explorer can leave on your hard drive.) Click OK.
  4. Now click on the Advanced tab.
  5. Scroll down to the Security section. Look for an item that says “Empty Temporary Internet Files folder when browser is closed” (should be the 8th item listed under Security). Check the box next to this item if it isn’t already checked. This will ensure that whatever files Internet Explorer creates will automatically get deleted every time you finish using it.
  6. Click Apply.
  7. Click OK.
(NOTE:  Click here to read the 2008 sequel to this Tech Tip, which explores third-party applications that improve upon the Clean-Defrag-Prevent model of PC health.)

12 September 2007

Microsoft WHAT?!?

I’ve found that a lot of people get 3 very different Microsoft products confused: Windows, Office, and Works. This week, I will attempt to clarify what each of these products are and how they are different.


MICROSOFT OFFICE

This is the suite of business applications that includes the following:

  • Microsoft Word
  • Microsoft Excel
  • Microsoft PowerPoint
  • Microsoft Outlook

Some versions also include Microsoft Access (a database application), Microsoft Publisher (a desktop publishing application), and Microsoft FrontPage (a webpage design application), as well as a number of smaller utility applications.

Microsoft Windows does not come with Microsoft Office. Although some computers are sold with both Microsoft Windows and Microsoft Office, most computers don’t necessarily come with Office. New computers almost never come with Office installed; it is usually purchased as an add-on option (for an additional cost) or separately. You’ll know if you have it at home because it cost you between $200 and $500.

  • Versions of Office include “2003”, “xp”, “2000”, and “97”.
  • Versions of Windows include “xp”, “2000”, “me”, “98”, and “98se”.

MICROSOFT WINDOWS

This is the “operating system” for most PCs…the environment in which applications can run. Without an operating system, your computer wouldn’t do anything. You would just turn it on and it would sit there with a blank screen. So it’s just an environment – something that runs in the background that gives you the ability to do stuff.

However, Windows XP does come bundled with a few rudimentary applications, such as Internet Explorer, Windows Media Player, Messenger, Movie Maker, WordPad (a seriously-lame word processor), Notepad (a text file editor/generator), Paint, Calculator, and a bunch of system tools and other goodies.

Windows also comes with a program called “Outlook Express”. As stated in a previous Tech Tip, this program is in no way related to Microsoft Outlook. It is essentially a stripped-down version of Outlook that only does e-mail (no calendar, contacts, or anything else). If you use the full Outlook, you should never even attempt to open Outlook Express on the same PC. At home, you may find that Outlook Express is a useful e-mail client.

Today, everyone using Windows should be using Windows XP. Older versions, such as “2000”, “me”, “98”, and “98se” are truly obsolete. If your computer at home is a Pentium III (400 MHz) or better, upgrade to Windows XP if you haven’t already. If your computer is a Pentium II (less than 400 MHz) or older, it’s time to throw it in the trash and buy a new computer!

MICROSOFT WORKS

Like a spork, Microsoft Works tries to be multiple things, and in doing so, is a failure at all of them. (I suppose it would compare better to the serrated spork / “grapefruit spork”.) For about $50, Works gives you a spartan word processor, a crummy spreadsheet program, a PowerPoint viewer (no editing capability), and a Fisher-Price version of Outlook.

The word processor doesn’t make .DOC files like Microsoft Word – it makes .WPS files. These .WPS files can be opened in Microsoft Word…but Microsoft Word .DOC files cannot be opened in Microsoft Works! Because this has become such a headache for so many people who transfer files between work and home (and can’t afford the hundreds of dollars that it costs to get Microsoft Office), some versions of Microsoft Works now come with the full Microsoft Word instead of the second-rate Works word processor.

The same compatibility issue can be said of Microsoft Excel and the spreadsheet in Microsoft Works.

If you work at home at all or have children in school, I recommend getting Microsoft Office. As an educator or an employee of a school, or a student, you can qualify for three reduced-cost versions:

  • “Microsoft Office Student & Teacher 2003”
  • “Microsoft Office Professional 2003 Academic Version”
  • “Microsoft Office Standard 2003 Academic Version”

These versions only cost between $100 and $160…an incredible discount over the versions available to the general public, as they offer all the same features. You can find the academic versions of Office at most locations that sell the standard versions.

05 September 2007

Sign Your Name (Across My Heart)

I’ve fielded some requests to explain how to create a signature block that automatically gets put at the bottom of outgoing email. First I’ll explain how to create a signature, then I’ll give some tips on how to make your signature block look more professional:

1. In Microsoft Outlook, click on Tools, then Options. Click on the Mail Format tab.

2. Click on the Signatures... button.

3. Now in the top box you’ll see a list of all signatures that you’ve created in the past. (It may be an empty list.) What we’re going to do is create some new, different signature blocks to use either in different circumstances or just to rotate to keep things interesting. Click the New... button to create a new signature block.

4. Give your new signature a title (maybe something like “Professional” or “Informal” or “Purple” or “Tuesday” or “Ketchup” or “Big Papi” or “Menudo”, etc.). If you’ve already created a signature block, you can save yourself time re-typing your personal info by clicking on the radio button next to “Use this existing signature as a template:”. Otherwise, you’ll need to start from scratch. Click Next >.

5. Now you can type in your signature block just the way you want. After all the text is there, select all of it and click on the Font... button to get the font and color just the way you like. Click on the Paragraph... button to make your signature block right-justified, left-justified, or center-justified.

6. Click Finish when you’ve got it the way you like.

7. Now, you’ll see the signature block you just created in your list of stored signature blocks. Click OK.

8. Finally, you can choose which signature block you want to use. In the drop-down box next to “Signature for new messages:” pick the signature block that you just created.

9. There is also an option to put a signature on replies and forwards. The default is none. We strongly recommend leaving this at the default. It’s rather annoying emailing back and forth with someone with a long string of identical signature blocks in the string of previous emails.

10. Click OK to finish.

Now here are a few ways of punching-up your signature block:

  • You can put a dividing line between your signature block and the text of the email by putting a long string of underscores (“_”) in the first line of your signature block, like this: _____________
  • Pick a light text color that doesn’t draw the eye away from the text of your email messages. The text color “Silver” is the one I use; it’s subtle, almost like a watermark. Avoid bright colors.
  • Only use one font throughout the whole signature block…
  • …but vary the text size and the use of boldface. Give your name and title more prominence with a larger font and/or boldface text.
  • For a different look, make your signature block right-justified or center-justified.


The appearance of this weekly e-publication with the views and opinions of authors, products or services contained therein does not constitute endorsement of Terence Trent d'Arby or Columbia Records.

29 August 2007

Freeze-Frame

The “screenshot” feature of Windows is a handy feature, particularly when you’re trying to teach how to do something on a computer. Taking a screenshot is just like taking a photo of what’s being displayed on your monitor. All you have to do is hit the Print Screen button on your keyboard and everything you see is captured to the clipboard. Then you can paste the screenshot into any application, such as Word or PowerPoint. Here are a few other screenshot tricks:

  • You can paste your screenshot into an email message. This is a nifty way of letting your IT staff know when you're getting an error message. E-mail them a screenshot of your issue so they can diagnose your problem faster!
  • To make a JPEG (JPG) file of your screenshot, open up the Paint application built into Windows. (Go to Start/All Programs/Accessories/Paint.) Select Edit/Paste to paste the screenshot onto your canvas. Then select File/Save As... to save the screenshot as an image file. The default is a bitmap file (BMP), which is very large and awkward in size. Change the “Save as type” to JPEG for a much more usable file.
  • You don’t have to take a snapshot of the entire screen if you don’t want to. Holding down the ALT key when you hit Print Screen will take a snapshot of just the active window!

22 August 2007

The Restart...It's Like Duct Tape

The greatest panacea for computer problems is the venerable “restart” (a.k.a. “reboot”). Often times, computer problems arise from conflicts in the computer’s memory between multiple programs running simultaneously. In addition, Microsoft Windows is notorious for “memory leak” issues: applications closing out but not erasing completely from memory, thus leaving data residue that takes up space. A simple restart flushes the computer's memory, resolving all these issues and many more. Restarting is like duct tape…it fixes everything! The next time your computer seems to be acting “funny”, do a restart before you call for IS service. You might save yourself (and us) a lot of time.

And on that note, please shut down your computer at the end of the day. That means more than just shutting off your monitor…you need to click Start/Shut Down and make sure “Shut Down” is selected before clicking “OK”. Not only will your computer be freshly-booted-up the next morning, but it extends the life of your PC. A computer that runs 24/7 will burn out sooner than one that gets a chance to rest…and downtime for your computer is downtime for your productivity!

15 August 2007

How to Remove the Annoying "Language Toolbar"

You may have something in the lower-right corner of your screen hogging some of your Taskbar space that looks like this:


This is a small application built into Microsoft Office called the Language Toolbar. There is a simple way of removing it.

1. Click on the tiny little down arrow ( ▼ ) that you see to the right of the question mark balloon. If you don't see the down arrow, follow the directions in the sidebar at the bottom of this Tech Tip.


2. In the box that pops up, select Settings... :


3. Now a dialog box pops up:


Click on the Language Bar... button.

4. Another box pops up. Uncheck the box next to Show the Language bar on the desktop:


5. Click OK to close the box.

6. Click OK to close the previous box.

7. The Taskbar at the bottom of your screen is now gone. It will not reappear when you restart your computer.


SIDEBAR

If the Language Toolbar is active on your desktop but you can't see the little down arrow, you will need to do the following:

1. Right-click anywhere on your Taskbar and make sure "Lock the Taskbar" is unchecked in the box that pops up:


2. With the Taskbar unlocked, you'll see Taskbar dividers that are now visible. Drag the divider next to the Language Bar to the left to expose the entire Language Bar:


Now the little triangle should be visible, and you can continue with step 2 above.

08 August 2007

A Great Photo Editing Alternative

Windows users are often in a bind when it comes to photo editing software. Windows comes with a very simple built-in application called Paint. It lacks some of the most commonly-used photo editing features, including crop and red eye removal.

Meanwhile, third-party software solutions such as Adobe Photoshop cost between $75 and $500.

Earlier this year I discovered a free, open-source photo editing application that's rich with features. It's called Paint.net, and it can be found here:

http://www.getpaint.net/index2.html

I've been testing this piece of software and it works very well. It is a vast upgrade over Paint, and its feature set and ease-of-use are similar to Adobe Photoshop Elements. The download is only 1.3 MB and the installation is quick and seamless. I have had little difficulty learning how to use Paint.net, and have found that it has more than enough features to do common photo editing.

Please note that Paint.net is not available for Mac or Linux, and it is only compatible with Windows XP and Vista. (Older versions such as Win98 and WinME are not supported.)

01 August 2007

Install Updates and Shut Down? Yes!

It's always a good idea to shut down your computer at the end of each workday. Not only does it save energy and prolong the life of many of your PC's components, but it gives the computer an opportunity to restart the next day. This flushes the system memory and gives you a "clean slate" to work with the following day.


It also gives Windows an opportunity to automatically install the latest updates and security patches. You'll notice that sometimes, when you select Start / Shutdown, it gives you this box:


You should click OK when it asks you to install updates and shut down. Important Windows Updates are being sent out to your computer to improve security and reliability. Don't change this option if it pops up.

After clicking OK, you can walk away from your computer. It will automatically shut down after the updates are installed.

25 July 2007

Adobe Reader 8 Problems

You may experience this problem we've found with Adobe Reader 8...

When clicking on a link to a PDF on a website in IE (6 or 7), the computer will sit there ("frozen") for about 5 minutes. Eventually you get an error message. Once they click OK, the PDF usually comes up. Certain PDF files may not open at all.

If this is the case for you and you have Adobe Reader 8 installed, here is the easy fix:

Go to Start / Programs
Select Adobe Reader 8

Now that you're in Adobe Reader 8, go to Edit / Preferences. This is the dialog box that pops up:


You want to un-check all 3 boxes, particularly the first one.

Click OK and it will do a brief install procedure. It may then ask you to restart the machine, which you should do.

Problem solved!

27 June 2007

Applications that Won't Uninstall

Ever encounter a program that won't uninstall from your PC no matter how many times you try? You've used the "Uninstall" icon in the Start / All Programs list. You've used Add/Remove Programs in the Control Panel. Nothing works. Maybe you get an error message during the uninstallation and it aborts. Maybe nothing happens at all.

Here is the fix:
http://support.microsoft.com/default.aspx?kbid=290301

This Windows Install Clean Up tool seems to extract even the most stubborn applications. It's not pretty, and I don't know what the consequences of this tool are on your system registry, but I haven't experienced any problems with it thus far.

20 June 2007

Put a Subtle Background on Your Word Document

It's easy to add a subtle background to your Word document, no matter what photo or graphic you choose.


First, paste your photo into the Word document and ensure it sits behind the text:


  1. Right-click on the graphic
  2. Select Format Picture...
  3. Select the "Layout" tab
  4. Select Behind text
  5. Click OK

Once you get the graphic placed where you want it on the page, right-click on it and select Format Picture... again. Then click on the "Picture" tab to get the following:


Under "Image Control", change the color to "Washout", which basically cranks up the brightness and reduces the contrast to the point that your image looks more like a watermark.

If this doesn't work with the printout, then I'd recommend using the "Watermark" feature in Word 2003. This webpage describes how to use it to great effect:

http://office.microsoft.com/en-us/word/HA010563291033.aspx?pid=CL100636481033

13 June 2007

Who Needs Adobe Acrobat Professional?

Believe it or not, you don't need the full (read: expensive) version of Adobe Acrobat Professional to make PDF files. There are free ways of saving your documents so that they always look and print exactly the way you intended -- no matter who opens them.

There are a number of free "PDF maker" programs out there. You can Google "pdf maker" to compare the leading ones. I happen to like this popular one:

http://www.cutepdf.com/Products/CutePDF/writer.asp

CutePDF works by creating a virtual printer on your computer. When you go to print to this "printer", it saves what would be your "printout" to a file on your PC. So you can use CutePDF in any program that prints! Your printouts become virtual pages right on your hard drive.

You can also go to the Adobe website and used their web-based converter for a free trial period:

http://createpdf.adobe.com/

Either way, there's no sense in shelling out big bucks for Adobe Acrobat Pro if all you need is simple PDF-making capability.

06 June 2007

For SysAds: Deploying Adobe Reader 8 as an Unmanaged Application

Adobe unceremoniously came out with Adobe Reader 8.1 recently, which tells me that maybe our problems deploying Adobe Reader 8 as a managed application have more to do with Reader 8.0 than with anything on our network.

You may find that creating this Adobe Reader GPO selectively deletes Adobe Reader off of PCs. This happens because at startup, the MSI detects a slightly-dissimilar version of Reader 8 on the client PC, deletes it, and then fail while trying to reinstall it to the "correct" version. After reinstalling Adobe Reader 8 three times on one single PC, I finally gave in and disabled the GPO.

I discovered today that the way Adobe Reader installs itself as a managed application is sneakier than I thought it was. The program doesn't run partially from the network. It runs completely from the network! Installing a network-based MSI registers the software on the client PC, icons are copied down, and the program is listed in the "Add or Remove Programs" list. But it doesn't exist anywhere on the C: drive of the client PC!! In fact, if you right-click on the shortcut icon (on the desktop or in the Start Menu) and select Properties, mysteriously there is no path where the shortcut leads to! (The target location is blank.)

Once I determined this, it explained a number of user issues that have been popping up. But not all of them.

In one case (on a test PC, actually), Adobe partially installed itself or partially removed itself. No shortcuts in the Start Menu, no entries in the Add/Remove Programs list. Reinstalling Adobe Reader would yield an error message that it was unable to uninstall the existing version. I was able to fix this issue by running the increasingly-handy Windows Install Cleanup Utility (see my previous blog post) and extracting the blank-titled application in the application list.

So....ultimately I decided to stop deploying Adobe Reader 8.x as a managed app and started to deploy it as an "unmanaged" application. The solution to the problem is a new script I just wrote and tested:
echo off
cls
if exist "c:\Documents and Settings\All Users\Start Menu\Programs\Adobe Reader 8*.*" goto END
echo.
echo Adobe Reader 8.1 will now be installed on your PC.
echo.
echo When the setup window pops up,
echo Click NEXT, then click INSTALL.
echo.
md c:\AdobeTemp
copy
\\SERVERNAME\Adobe_Reader_8.1$\AdbeRdr810_en_US.exe
c:\AdobeTemp
cd c:\AdobeTemp
AdbeRdr810_en_US.exe
del /Q *.*
cd \
rd c:\AdobeTemp
:END

This script, which now executes at startup, first checks to see if Adobe Reader 8.0 is installed. If not, it copies the 21 MB single-install EXE file off of the server into a local temp directory in the root of C:. Then it executes the EXE file to do the install, and once the install is done, the temp directory is emptied and deleted.

This GPO script style is not as elegant as a GPO that uses an MSI file directly, but it guarantees that Adobe Reader 8.1 will be completely installed locally so that no workstation will rely on server files to run.

This script has worked for several PCs now.

30 May 2007

For SysAds: What to Do About Those .PST Files?

If you want to see a topic that IT folks really get into heated debate about, Google the search phrase "network PST". PST files -- those huge files that Microsoft Outlook creates locally on workstations to store/archive just about anything from email to contacts to tasks -- are a system administrator's nightmare. Stored locally on each user's C: drive, they almost never get backed up to tape. Essentially unseen by everyone (including the user), they can grow to gargantuan size. And without being part of the user's roaming profile, they don't transfer when a user receives a new PC.

Originally, I thought that the best practice was to redirect all PST files to a server location, preferably a folder eponymous with the username. The rationale was that by keeping all the PST files on a server, they could both be backed up and kept in-check. However, the more research I do, the more I think this server-side PST file idea is a bad one. For starters, here's Microsoft's stance on this practice:

http://support.microsoft.com/kb/297019/en-us

Here's one article that talks about why server-based PSTs are a bad practice:

http://blogs.technet.com/askperf/archive/2007/01/21/network-stored-pst-files-don-t-do-it.aspx

Granted, they're talking about huge (multi-GB) PSTs being pulled by hundreds of clients simultaneously, which is not the case with our network. (No user appears to have a PST file larger than 700 MB, and nearly all PST files are under 100 MB.)

However, I'm still concerned about the possibility for data corruption and server downtime.

There are a lot of alternate solutions being debated on all these tech blogs, but two easy ones that make sense for us stick out in my mind:

1. Continue to use the server as a PST store, but only as a backup.

Have the users write to their PST files locally, then have a logoff script upload the PST files at the end of the work day. No more worries of data corruption and server bandwidth problems, but we can still see how big everyone's PST files are and maintain a backup of them should any of the workstation hard drives crash.

2. Standardize/lock down the AutoArchive function of Outlook via GPO.

Here's how: http://office.microsoft.com/en-us/ork2003/HA011402861033.aspx (Most users have no idea what the heck they're agreeing to when the AutoArchive dialog box pops up.) Doing this, you can also set up a Retention Policy, which is disabled by default if you go to your Outlook settings and look at the bottom of the AutoArchive dialog box:


This is the PST backup script that I created:


@echo off
cls
echo This script will copy all OST and PST files
echo from your C: drive to M:\Outlook_Backup.
echo Please exit from Microsoft Outlook before continuing.
echo ----------------------------------------------------------
pause
echo.
md M:\Outlook_Backup
cd "%USERPROFILE%\Local Settings\Application Data\Microsoft\Outlook"
copy *.* M:\Outlook_Backup\
pause

23 May 2007

For SysAds: When Workstations Can't Connect to the Domain

Sometimes, for reasons not readily apparent, a client PC will "drop off" the domain. You'll know this because suddenly, no user will be able to log into the domain from that PC even though the NIC is active and the computer has unfettered connectivity to the switch.

When trying to join a computer to the domain, simply log onto the machine using a Local Admin account, right click on My Computer, select Properties, select the Computer Name tab, click the Change button, and retype the name of your domain in the Domain text box. Click OK twice and it will ask you to reboot this particular workstation. If you are unable to change the Domain name, an alternative solution is to switch the computer to Workgroup mode (in this same dialog box), reboot it, then switch it back to Domain mode again. In either case, the PC should now reappear in Active Directory.

The only problem is that it may not appear in the Computers bucket in Active Directory -- often times it won't be there even though it should be.

If this happens, run a search on it. Change "Users, Contacts, and Groups" to "Computers". Change the In: field to "Entire Directory". You may have to leave the Computer name: field blank and scroll through all the search results.

The computer will be found by this search even though you won't be able to find it yourself by searching through all the Active Directory buckets!

Now, you just have to right-click on that computer in the search results and select Move... . Select the bucket that this computer should go into and click OK. Now, even though you couldn't see it before, it will magically appear in the bucket you chose!

16 May 2007

For SysAds: Symantec Antivirus Clients Not Pointing to Correct Server

Migrating clients from one Symantec Antivirus Server to another can sometimes leave certain clients "orphaned" without a server to manage them. Comparing the list of clients you see in Symantec System Center Console up against your actual workstation inventory can go a long way towards identifying which machines aren't pointed at the current Symantec server.

One way to repoint orphaned clients is to use the ClientRemote Install feature of Symantec System Center Console. If the Console can see the workstation and the workstation has Remote Desktop enabled, you an remotely upgrade its AV software and simultaneously point it to the correct server.

However, not all workstations fit this criteria. So I wrote a short script that will fix the problem at startup on select machines. You will need to create a tiny marker file on your server called "sym_serv.txt" that flags the PCs that this script has run on. Here's the script:

@echo off
IF EXIST C:\sym_serv.txt GOTO End
cls
echo Windows needs to update your Symantec Antivirus client software.

copy "\\SERVERNAME\c$\Program Files\SAV\GRC.DAT" "C:\Documents and Settings\All Users\Application Data\Symantec\Symantec AntiVirus Corporate Edition\7.5\GRC.DAT"
IF ERRORLEVEL 0 copy
\\SERVERNAME\dfsfiles\Symantec_Server\sym_serv.txt c:\
:End
pause


It's pretty straightforward: it checks for the marker file to make sure this doesn't get done more than once. If no marker, then it copies the GRC.DAT file fresh off the Symantec server into the appropriate local folder. Then it creates the marker file if successful.

I'd recommend creating a separate OU with its own GPO that runs this script at startup. Then you can target just the orphaned workstations.

09 May 2007

For SysAds: Deploying Adobe Reader 8 as a Managed App, Part 2

So here is the formal step-by-step I created for setting up Adobe Reader 8 as a Managed Application. See the following PDF manual (ironic as that sounds) for additional information: http://www.adobe.com/devnet/acrobat/pdfs/gpo_ad_8.pdf

Go to the Adobe site to download the installer:
http://www.adobe.com/products/acrobat/readstep2_servefile.html?option=full&amp;amp;amp;amp;order=1&type=&language=English&platform=WinXPSP2&esdcanbeused=1&esdcanhandle=1&hasjavascript=1&getsconly=1&amp;amp;amp;amp;x=76&y=25

This installer EXE file is small. When you run it, it downloads the actual Adobe Reader 8 EXE file. Save the large (~21 MB) Adobe Reader 8 EXE file to your desktop -- don't run it.

Now it would be best to create a shared folder on a commonly-accessible network drive that will hold all of the Adobe Reader 8 installation files that you are about to create. This folder is referred to by Adobe as the “distribution point”.

This next step is small but important! Once you make this folder, right-click on it and select Properties. Now select the Security tab. Add the security group “Domain Computers” to this list. If you don’t, none of the client workstations will have the rights to access the installation files.

Then follow the directions on this obscure knowledge base article to create an MSI file from this EXE file: http://www.adobe.com/cfusion/knowledgebase/index.cfm?id=kb400540

I tried it and it works: it creates the MSI. But here’s the thing: you can’t push this MSI out to clients. According to another document that Adobe put out, you have to do an "administrative installation" of that MSI first. To do this, you have to do a Start / Run and type in:

Msiexec /a \\INSERT PATH
HERE\AcroPro.msi

Then when it asks you where you want to install the files, you need to tell it to install the files into your distribution point.

Now that you’ve got the distribution point all set up, you will want to customize the your client-side version of Adobe Reader 8. This step is optional, but skipping it might lead to a large amount of user-induced pain. To customize, use the Adobe Customization Wizard, which can be downloaded here:

http://www.adobe.com/support/downloads/detail.jsp?ftpID=3564

Once you’ve downloaded and installed the Adobe Customization Wizard, run it and open up the MSI file in your distribution point. Here are some changes that I recommend:

- Under Personalization Options, set Installation Path to your distribution point path
- Under Installation Options, select Run Installation Silently and Suppress Reboot
- Under Shortcuts, uncheck the worthless Desktop shortcut
- Under EULA and Online Features, check Suppress display of End User License Agreement (EULA), check Disable all updates, and check In Adobe Reader, disable Help > Purchase Adobe Acrobat
- Under Toolbars and Document Status, check Do not show Beyond Reader at startup and
check Disable Adobe Online Services

Once you’ve set up Adobe Reader 8 the way you want it set up, click Save and it will prompt you for a location to save an MST file. Save this MST file in your distribution point. This file contains all the changes you just made.

If you get an error message when you save this MST file, it’s because the admin installer utility forgot to put a file called ‘setup.ini’ into the distribution point folder that contains the MSI file. You will have to create it and put into your distribution point if you need it. The file should look like this:

[Startup]

RequireOS=Windows 2000

RequireMSI=3.0

RequireIE=6.0.2600.0

CmdLine=/sall /rs

[Product]

msi=AcroRead.msi

CmdLine=TRANSFORMS="AcroRead.mst"

[Windows 2000]

PlatformID=2

MajorVersion=5

ServicePackMajor=4


[MSI
Updater]

Path=http://ardownload.adobe.com/pub/adobe/reader/win/8.x/8.0/misc/WindowsInstaller-KB893803-v2-x86.exe

Now you’re ready to create a GPO in Group Policy Management. Right-click on the appropriate OU and select Create and Link a GPO Here… . Name your new GPO and hit Enter.

Right-click on your new GPO and select Edit… . Go to Computer Configuration / Software Settings / Software installation. Right-click in the right-hand pane and select New / Package… .

Browse to the MSI file in your distribution point and click Open. Now select Advanced and click OK.

Under the Deployment tab, select Assigned. Leave “Uninstall this application when it falls out of the scope of management” unchecked.

Under the Modifications tab, click the Add… button. Now browse for the MST file that you created in steps 7-9 (it should be in your distribution point).

Click Apply, then click OK.

Now a couple more edits need to be made to this GPO within the Group Policy editor. Go to Computer Configuration / Administrative Templates / Windows Components / Windows Installer.

Double-click Always install with elevated privileges, change to Enabled, then Apply and click OK.

Double-click Logging, change to Enabled, and in the text box, type iweaprcv and click Apply then OK.

Your GPO is now live, so you may want to unlink it at this time…particularly because we still have to tackle the workstations that still have Adobe Reader 5 installed.

Don't forget about the short script thtat checks a PC to see if Adobe Reader 5 is installed, and if so, uninstalls it from that PC. You will create another GPO that runs this script at startup on
all your client workstations.

Save this script into your distribution point. Then create a new GPO like
you did in step 10.

Right-click on your new GPO and select “Edit…”. Go to Computer Configuration / Windows Settings / Scripts / Startup. Click the Add… button. Browse to your script file and click Open, then OK. Click Apply, then click OK.

Now your Adobe Reader 5 removal GPO is live. If both of these GPOs are live, then when a client in the OU restarts, first Reader 8 will get pushed to the client, then any existing version of Reader 5 will be uninstalled. Unfortunately, I have found through testing that doing these two actions in this order is problematic: the uninstall ends up messing up a small part of the Reader 8 installation. So my recommendation is to first turn on just the Reader 5 GPO and let it remove Reader 5 from your client workstations for several days. Then once all or most of your workstations are clear of Reader 5, turn on the Reader 8 push.

If, in spite of your efforts, the Reader 5 removal happens after the Reader 8 push on a particular workstation, one of two things might happen:

a) When launching Reader 8 for the first time, Windows has to rebuild some of the application files for Reader 8 that got deleted by the uninstall. This process can take as much as 10-15 minutes, but it seems to work.
b) The file association for PDF gets somehow zapped by the uninstall. The user would have to
know or be assisted to re-associate PDF with Adobe Reader 8.

Good luck!