28 November 2007

Some Advice About Inkjet Printers, Part 1

I have doled out a lot of verbal advice over the past few years related to inkjet printers: which ones to buy, when to replace the cartridges, when to replace the printer you've got, and so on.

It's time to wrap all of it up into a three-part series of Tech Tips. I have several pointed opinions related to inkjet printers, mainly because I think that the inkjet business has become fraught with deception and waste in recent years. This week, I will try to reign in some of my frustration and boil down the most important things to know about inkjet printers and cartridges. Some may be news to you.


1. Inkjet printers themselves have little-to-no actual street value.

You read that correctly. Don't believe me? Right now, your favorite electronics store is selling straight-up (non-scanning, non-faxing) inkjet printers for prices between $30 and $140. One glance at BestBuy.com shows that the average cost of the 5 desktop inkjet printers they have for sale is $85.49.

But they probably come with ink cartridges, which are worth by themselves close to 60 or 70 dollars! For instance, the median-priced Epson Stylus C120 printer requires 4 ink cartridges (black, yellow, cyan, and magenta). While BestBuy.com sells the C120 for exactly $85.49, it also sells those 4 cartridges at a combined price of $56.46. That means that the printer itself (minus the cartridges) is really worth less than $30.

So if a brand-new printer is really only worth $30, then how much does your 5- or 6-year-old inkjet printer worth? Probably nothing. These days, when your aging inkjet printer runs out of ink, it is actually more cost-effective to throw it away and buy a new printer than to buy new ink cartridges for it.

For instance, suppose you have an old HP DeskJet 990cse inkjet printer. This printer is probably about 7 years old, and you've found that it needs new ink cartridges: a black cartridge (#45) and a 3-color cartridge (#78). A quick check on BestBuy.com shows that these cartridges cost $31.99 and $36.99 respectively, for a whopping grand total of $68.98. For that amount of money, you could just throw the printer out and buy a brand-new inkjet that comes with its own new cartridges! Plus, you would get a far-better printer (virtually all inkjet printers on the market these days print decent photos), fresh from the factory with a new warranty.

Why is this the case? Because inkjet printer manufacturers realized that the money to be made isn't in the printer -- it's in the ink. I liken this to the refillable razors made by companies like Gillette. The razors cost very little -- the cartridges are what cost money. At CVS, you can purchase the MACH3 razor for $8.49, which comes with 2 cartridges. But a package of 4 cartridge refills is $9.19....more than a new razor!

The bottom line is that inkjet manufacturers know that once you buy their printer, you're essentially stuck buying ink cartridges from them. There are exceptions to this which I will describe later, but keep this rule in mind.

2. Many inkjet printers lie to you about when you need to replace its cartridges. Don't replace an ink cartridge until it is completely out of ink.

Once inkjet manufacturers realized how much money they could make selling you cartridges that you have to buy from them, the next thing they realized they could do is force you to buy cartridges more often. Many, like Lexmark, did this by selling you cartridges that make it impossible to see how much ink remains in the cartridge:

With an opaque case and no "window" into the ink tank, you have no idea how much ink is in the cartridge. The only way to tell is -- surprise! -- the manufacturer's ink monitor software on your PC! Sense a conflict of interest here? What would stop a piece of software from reporting that the ink is lower than it really is? Wouldn't it boost company profits if consumers were told to replace their ink cartridges before they were completely empty?

Epson certainly thought so. That's why they just settled a class-action lawsuit against them for "breach of contract, breach of implied warranties, unjust enrichment, [and] fraudulent concealment," among other things related to their inkjet cartridge business model. You can read more about the lawsuit here (http://www.epsonsettlement.com/), but you can boil it down to one particular abstract:

Among other things, Plaintiffs allege that Epson inkjet printers and inkjet cartridges indicate that cartridges are “empty” and suspend printer function, even though substantial ink remains. EAI has denied and continues to deny the claims and any wrongdoing, but has decided to settle to avoid the cost and inconvenience of litigation. The Court has not issued any rulings about the validity of the claims.

Epson printers are also notorious for giving you an additional "Ink is Low" warning. Once the ink level in a particular cartridge gets below a certain point, you receive this warning every single time you print something. While your natural inclination is to replace this cartridge, do not replace it! There is still plenty of usable ink left in that "low" print cartridge. This is simply one more deceitful way that your printer manufacturer is trying to trick you into throwing ink away and buying more of it from them.

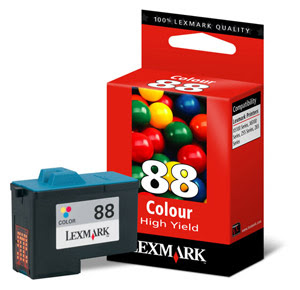
3. And whenever possible, buy clear-case ink cartridges.

Related to the last topic, the easiest way to avoid this Mystery Ink Level scenario is to buy ink cartridges with clear, see-thru cases, such as this one:

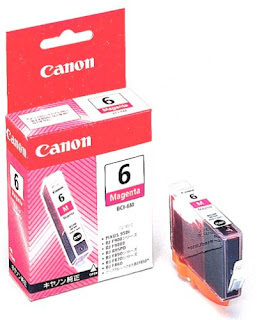
With clear cases, you can visually inspect a cartridge when the printer or its software tells you the ink is low to verify. This may take some prior planning, as only certain printers use these type of cartridges. When shopping for a printer, take a good look at the cartridges that it uses. Try to buy a printer that uses clear-case ink cartridges.

That's all for this week! Tune in next week and the week after for lots more related inkjet advice...

Click here for Part 2 in this series on inkjet printers...

21 November 2007

Holiday Mailings Made Easier

It's the holiday season once again, and that means it's time to bulk-mail family photos, personal narratives, and other silly things to our friends, family, and.....well, pretty much everyone we know with a valid mailing address!

Despite the fact that technology for doing mass-mailings has been around for decades, many people still try and do their holiday mailings by hand!!! Not automating a task like this is like forgoing the garden hose to fill your swimming pool with buckets of water from the kitchen sink.

You are probably aware that Microsoft Word has the ability to do mailing labels, envelopes, form letters, and other mass-mailing functions, but may not know how to use it. The "mail merge" was one of the first big uses of early personal computers -- so called because you were in essence merging an address database with a word processing document or documents.

This week, I will show you how to use the Mail Merge feature of Microsoft Word to create pages of mailing labels for your holiday envelopes...


1. First, you will need to purchase 8.5"x11" sheets of mailing labels at your local office supply store. The labels can be any size and any number per page, but make sure that there is an "Avery #" that describes the type of labels you purchase. The "Avery #" is a 4-digit number, such as "Avery 5920". You will need this "Avery #" later to tell Microsoft Word what type of labels are in your printer.

2. Open up Microsoft Word and start with a blank document.

3. In the menu bar, go to Tools / Letters and Mailings / Mail Merge...

4. In the right-hand pane that appears in your Microsoft Word window, select Labels, then click Next.

5. Ensure Change document layout is selected, then click Label options...

6. Now, you will need to select your "Avery #" from the scroll box under "Product number". Somewhere in this scroll box, the type of labels you purchased should be listed.

7. Click OK, then click Next.

8. Now you have to tell Word where all your addresses are. There are a lot of different ways of storing addresses on a PC, but two very common ways are using a simple Microsoft Excel spreadsheet or using the Contacts feature of Microsoft Outlook. I will assume you use the former: an Excel spreadsheet.

(If you use the latter, then you'll want to click on Select from Outlook Contacts and then Choose Contacts Folder. Highlight "Contacts" and click OK. Then skip ahead to step 13.)

9. Ensure Use an existing list is selected, then click Browse...

10. Now show Word where your Excel file is located on your hard drive. Browse for it, select it, then click Open.

11. Your Excel file may have more than one worksheet in it. If so, Word will now ask you which worksheet to use. Most likely, you put all your data in the first one, so select the first table. Also, if you put a "header row" in your spreadsheet (a row of column titles, like "Last Name", "First Name", "Street", "City", "State", etc.), check the box next to "First row of data contains column headers".

12. Click OK. Now a new dialog box appears...let's take a look at it:


13. You'll see that Word has parsed your mailing list and tried to make some sense of it. Look along the header row to ensure that all of your important categories are there: Last Name, First Name, Street, City, State, ZIP. There may be other categories as well. Look down each column and verify that the data (on the whole) is in the column that it belongs in.

14. Now examine each row. Un-check boxes for people you don't want to print a label for. Microsoft Word does not care why you don't want to send Christmas cards to these people. Perhaps you are upset with this person because he or she has insulted your car, or failed to invite you to a private book burning, or given you a serious but treatable venerial disease. No matter the case, Microsoft Word respects your decision to leave them out of your mail merge. It will not broadcast your decision over the Internet, nor will it ask "Are you sure?" like other applications might.

15. Seriously, though, you may find rows in this list of bogus or nonsensical data. You might as well un-check the boxes for these rows as well, as they will only waste labels. Once your check boxes are the way you want them, click OK, and this dialog box finally disappears.

16. Click Next.

17. Now click Address block...

18. In the "Insert Address Box" dialog box that appears, you can now customize the way the names and addresses will be presented:


In the first drop-down box, select how you want the names to appear. Then you might want to uncheck the box next to "Insert company name" unless these are business contacts receiving your mailing. The last two check boxes should probably remain checked.

19. Now click the Match Fields... button. Another dialog box pops up:


20. Carefully look through this list of fields. This is where Word tries to match up address fields with the columns in your address data. A lot of times it has to guess, and it is not a very good guesser. For instance, in the above example, you can see that Word was unable to determine which column was the "State" column in my Excel address list. To correct this, you simply click on the down-arrow next to the incorrect guess (in this case, it says "(not matched)") and select the correct column from the drop-down box. When all the important fields (Street, City, State, ZIP, etc.) are correct, click OK.

21. Now click OK again, and now you should see that "<>" has been added to the first label on your label sheet.

22. Back to the right-hand pane we go! Click the Update all labels button. Now the "<>" has been added to all the other labels.

23. Click Next. Now you can see a preview of your label sheets! Click the >> and << buttons to scroll through the list.

24. Click Next.

25. Click Edit individual labels...

26. Make sure All is selected, then click OK.

27. You now have a new Word document with all of your labels on it ready to go! Do yourself a favor and save it now before you make any tweaks to it.

28. You may want to change the font to something more interesting. If so, simply hit CTRL-A to select the whole document, then change the font to something festive. I like "Viner Hand ITC", myself.

29. Eyeball your labels one by one to ensure the mail merge didn't create any oddities, such as extra spaces, random punctuation, partial addresses, or bogus listings. Also watch out for special/unique circumstances that the mail merge may not have been aware of, such as spouses who have different last names and people who go by their middle name. This is your opportunity to edit and tweak individual labels before you print them.

30. Once everything is looking tip-top, save your document and print it out onto your label sheets! Make sure you load the label sheets into the printer correctly. Top-load inkjets generally want them face-up, while bottom-load inkjets want them face-down. Laser printers can be either, but I would wager a guess it probably wants them face-up. If you're not sure, use a marker to write a small "X" on a piece of paper, load it face-up, and print page 1 of your labels on it. If the "X" ends up on the same side as the printed text, then you want to load the label sheets face-up.

31. If you find major errors in your labels, don't fret. You can still go back to the mail merge process you ran earlier. Click back to the other Word window you have open...you'll find your mail merge session still intact:
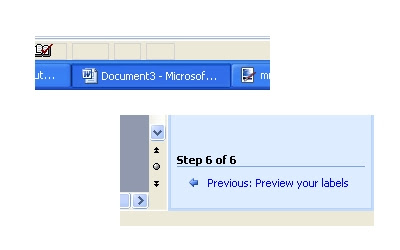
Click on Previous in the right-hand pane to go back through the mail merge process. You can make adjustments, then regenerate labels as many times as you need until you get the labels exactly the way you want.

14 November 2007

Share and Share Alike

People often ask how they can share their personal calendar in Outlook with other employees. It's very easy to do.

In Outlook, go to Tools and select Options. Then click on the Delegates tab...


Here, you can add people and give them permissions (or the lack thereof) to whatever you'd like them to see and/or edit in your Outlook account: Calendar, E-mail, Personal Contacts, etc.

Click the Add... button and select the names of people you want to give permissions to.

Click the Add -> button, then click OK. Now the names should appear in the Options dialog box (pictured above).

Highlight a name in this dialog box and click the Permissions... button to customize the permissions for that person.


Now you can give the user permissions to whatever you'd like. Make sure you uncheck the box next to "Delegate receives copies of meeting-related messages sent to me" unless this person is your personal secretary. You may want to check the box next to "Automatically send a message to delegate summarizing these permissions" if you don't feel like telling them personally.

The other checkbox, for allowing the delegate to see your "private items", is up to you. "Private items" are calendar items, e-mails, and others that are specifically marked 'Private' in their Properties. For instance, perhaps you are scheduling a surprise party for your delegate. You do not want your delegate to see a calendar item that says "Surprise Party for Mark at Burger King in Westborough". However, you do want your delegate to know that you will be busy at that point in time. Just click the "Private" checkbox in the lower-right corner of your Calendar item properties window and the item becomes private. On your calendar, the item will be denoted as private with a key symbol. Your delegate will see your calendar, but that item will simply be labeled 'Private' and unavailable for them to view.

Once you've been granted permission to someone else's calendar, go to your own calendar in Outlook. In the left-hand pane, click on "Open a Shared Calendar...".

Type in that person's username. Now their calendar will appear side-by-side with your own calendar! Also, under "Other Calendars" in the left-hand pane, and that person's calendar appears with a checkbox, allowing you to view or hide that person's calendar anytime in the future.

07 November 2007

Help Us Help You

Nothing is more time-consuming for IT Help Desk people than trying to troubleshoot poorly-described help requests. Here are a few examples of the most common poorly-worded help requests that the average IT department receives and some simple solutions:

1. “Something’s wrong with my computer.” / “The computer in room ___ is acting funny.”

This is about as non-descript as you can get. Is the computer covered in coffee? Has someone turned the monitor upside down? Is it on fire?

If you don’t know what’s wrong with your PC, at least give your Help Desk the answers to these simple questions:
  • What do you see on the screen?
  • What were you doing when this started happening?
  • What are you trying to do/unable to do now?

2. “I can’t log in.”

These days, there are a lot of different places that an employee of a company has to do at different times:

  • Initial log in to the network domain
  • Opening up Outlook...usually an invisible log-in, but not always
  • Using Outlook Web Access at home or at a remote site for email
  • Using a VPN client to connect to the network remotely
  • Logging into a particular database or data warehouse
  • Many more!

Tell your Help Desk which one you’re talking about! Also, if you forgot your password, just say so. It’s easy to reset it, but they need to do it over the phone or in person. And for security reasons, don't trasmit passwords over email.

3. “There’s no network at home.”

This is a non-specific description of one of many unique possible problems. You will need to do some troubleshooting to narrow down to the source of the problem.

First of all, are you able to surf the internet? Test this by typing in the name of a website at the top of your Internet Explorer window, such as http://www.google.com/ or http://www.yahoo.com/.


If no websites appear, then it’s best to turn the cable modem (or DSL modem) off and on. This resets the connection with the Internet Service Provider (ISP) and usually corrects this problem.
Still no websites? Next, turn the router off and on (if there is one).

If you are able to surf the internet and still can't "log-in" to get company email or network resources, then your problem is either:

(a.) Difficulty logging in to Outlook Web Access for email

or

(b.) Difficulty establishing a VPN connection

If the answer is (a.), then you have an issue with your network account that requires you to reset your password. If the answer is (b.), then the VPN settings have probably been misconfigured. When you call your Help Desk, be sure to describe which of these two it is.

4. “I can’t print.”

Do you have any printers installed in your user profile? This should be your first check. Click on Start, then click on Printers and Faxes. (If you don't see "Printers and Faxes", click on Settings, then you should see a link for Printers and Faxes.) A window will pop up with all of your installed printers. If you don't see any here, you'll need to install a printer by clicking on Add a printer under "Printer Tasks" in the left column of the window. For more detail on how to install a printer, please see my 6 November 2005 Tech Tip entitled "I can't print!!!".

Which printer are you trying to print to? A likely problem is that the wrong printer is set as the default. In this "Printers and Faxes" window you now have open, your default printer is marked with a check mark like so:

Did you look in the print queue to see if that printer is printing other jobs ahead of yours? To look in the queue for a particular printer, simply double-click on that printer in this "Printers and Faxes" window and its queue will appear in a new pop-up window. It may be the case that the printer is stuck on a job in front of yours. Try deleting the print job at the top of the list. Then turn the printer off and back on again to clear the memory.


Help us help you. There are a million things that can go wrong on a computer network, so the more information you give us about your problem, the better chance we have of solving your problem in a timely manner.


“I'm out here for you! You don't know what it's like
to be me out here for you. It is an up-at-dawn
pride-swallowing siege that I will never fully tell you about!
Okay?! Help me help you…help me help you.”

(from the motion picture Jerry Maguire)