1. Open up a new mail message in Outlook.
2. In the menu bar, under View, select Options.
3. Here, you can set up a number of intriguing options for your outgoing message. Since we're focusing on voting buttons this week, check the box next to Use voting buttons:
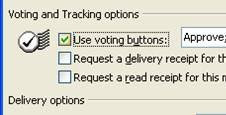
4. There is a drop-down box next to this option. You can select from the default voting choices (Approve or Reject, Yes or No, Yes or No or Maybe), or you can make your own. Making your own is simple: just separate the choices you want to give with semicolons like so:

5. Click the Close button.
6. Compose your email message as normal, perhaps asking the recipients to vote by clicking on one of the buttons they see below their menu bar.
7. Hit Send and off it goes.
8. Your recipients will receive your email message, and it will contain the voting buttons that you set up in step 4 below the menu bar:
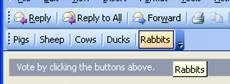
9. All each recipient has to do is click on a button and a reply email with their vote is sent back to you automatically. Super-fast and effortless.
10. Meanwhile, you can track the voting on your computer. Simply open up the message you just sent (it will be in your Sent Items folder). Select the Tracking tab next to the Message tab. Under Tracking, you can see all the people you sent your message to and what they voted for (if they voted), plus what the current tally of each choice is:


No comments:
Post a Comment